- Remove the `stop script if command error` step from GitHub workflows
- Remove the `script_stop` option from the README and its translations
- Remove the `script_stop` input from `action.yml`

Signed-off-by: appleboy <appleboy.tw@gmail.com>
12 KiB
🚀 用于 GitHub Actions 的 SSH
GitHub Action 用于执行远程 SSH 命令。
输入变量
更详细的信息,请参考 action.yml。
| 输入参数 | 描述 | 默认值 |
|---|---|---|
| host | SSH 主机地址 | |
| port | SSH 端口号 | 22 |
| passphrase | SSH 密钥密码短语 | |
| username | SSH 用户名 | |
| password | SSH 密码 | |
| protocol | SSH 协议版本(tcp, tcp4, tcp6) | tcp |
| sync | 如果有多个主机,启用同步执行 | false |
| use_insecure_cipher | 使用不安全的密码算法 | false |
| cipher | 允许的密码算法。如果未指定,则使用适当的算法 | |
| timeout | SSH 连接到主机的超时时间 | 30s |
| command_timeout | SSH 命令的超时时间 | 10m |
| key | SSH 私钥的内容,例如 ~/.ssh/id_rsa 的原始内容 | |
| key_path | SSH 私钥的路径 | |
| fingerprint | 主机公钥的 SHA256 指纹 | |
| proxy_host | SSH 代理主机 | |
| proxy_port | SSH 代理端口 | 22 |
| proxy_protocol | SSH 代理协议版本(tcp, tcp4, tcp6) | tcp |
| proxy_username | SSH 代理用户名 | |
| proxy_password | SSH 代理密码 | |
| proxy_passphrase | SSH 代理密钥密码短语 | |
| proxy_timeout | SSH 连接到代理主机的超时时间 | 30s |
| proxy_key | SSH 代理私钥的内容 | |
| proxy_key_path | SSH 代理私钥的路径 | |
| proxy_fingerprint | 代理主机公钥的 SHA256 指纹 | |
| proxy_cipher | 代理允许的密码算法 | |
| proxy_use_insecure_cipher | 使用不安全的密码算法 | false |
| script | 执行命令 | |
| script_file | 从文件执行命令 | |
| envs | 传递环境变量到 shell 脚本 | |
| envs_format | 环境变量传递的灵活配置 | |
| debug | 启用调试模式 | false |
| allenvs | 将带有 GITHUB_ 和 INPUT_ 前缀的环境变量传递给脚本 |
false |
| request_pty | 请求伪终端 | false |
使用方法
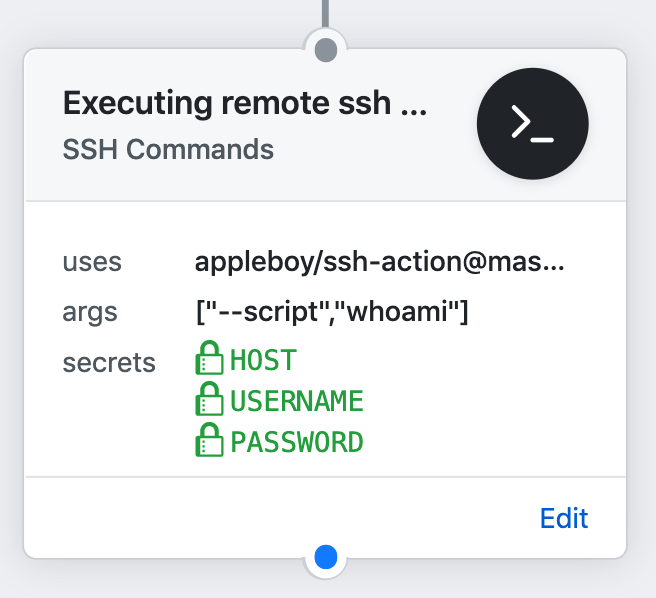
执行远程 SSH 命令
name: remote ssh command
on: [push]
jobs:
  build:
    name: Build
    runs-on: ubuntu-latest
    steps:
      - name: executing remote ssh commands using password
        uses: appleboy/ssh-action@v1.2.0
        with:
          host: ${{ secrets.HOST }}
          username: ${{ secrets.USERNAME }}
          password: ${{ secrets.PASSWORD }}
          port: ${{ secrets.PORT }}
          script: whoami
画面输出
======CMD======
whoami
======END======
out: ***
===============================================
✅ Successfully executed commands to all hosts.
===============================================
设置 SSH 密钥
请在创建 SSH 密钥并使用 SSH 密钥时遵循以下步骤。最佳做法是在本地机器上创建 SSH 密钥而不是远程机器上。请使用 Github Secrets 中指定的用户名登录。生成 RSA 密钥:
生成 RSA 密钥
ssh-keygen -t rsa -b 4096 -C ”your_email@example.com“
生成 ed25519 密钥
ssh-keygen -t ed25519 -a 200 -C ”your_email@example.com“
将新生成的密钥添加到已授权的密钥中。详细了解已授权的密钥请点此处。
将 RSA 密钥添加到已授权密钥中
cat .ssh/id_rsa.pub | ssh b@B ’cat >> .ssh/authorized_keys‘
将 ed25519 密钥添加到已授权密钥中
cat .ssh/id_ed25519.pub | ssh b@B ’cat >> .ssh/authorized_keys‘
复制私钥内容,然后将其粘贴到 Github Secrets 中。
复制 rsa 私钥内容
clip < ~/.ssh/id_rsa
复制 ed25519 私钥内容
clip < ~/.ssh/id_ed25519
有关无需密码登录 SSH 的详细信息,请见该网站。
来自读者的注意事项: 根据您的 SSH 版本,您可能还需要进行以下更改:
- 将公钥放在
.ssh/authorized_keys2中 - 将
.ssh的权限更改为 700 - 将
.ssh/authorized_keys2的权限更改为 640
如果你使用的是 OpenSSH
如果您正在使用 OpenSSH,并出现以下错误:
ssh: handshake failed: ssh: unable to authenticate, attempted methods [none publickey]
请确保您所选择的密钥算法得到支持。在 Ubuntu 20.04 或更高版本上,您必须明确允许使用 SSH-RSA 算法。请在 OpenSSH 守护进程文件中添加以下行(它可以是 /etc/ssh/sshd_config 或 /etc/ssh/sshd_config.d/ 中的一个附加文件):
CASignatureAlgorithms +ssh-rsa
或者,Ed25519 密钥在 OpenSSH 中默认被接受。如果需要,您可以使用它来替代 RSA。
ssh-keygen -t ed25519 -a 200 -C ”your_email@example.com“
Example
使用密码执行远程 SSH 命令
- name: executing remote ssh commands using password
  uses: appleboy/ssh-action@v1.2.0
  with:
    host: ${{ secrets.HOST }}
    username: ${{ secrets.USERNAME }}
    password: ${{ secrets.PASSWORD }}
    port: ${{ secrets.PORT }}
    script: whoami
使用私钥
- name: executing remote ssh commands using ssh key
  uses: appleboy/ssh-action@v1.2.0
  with:
    host: ${{ secrets.HOST }}
    username: ${{ secrets.USERNAME }}
    key: ${{ secrets.KEY }}
    port: ${{ secrets.PORT }}
    script: whoami
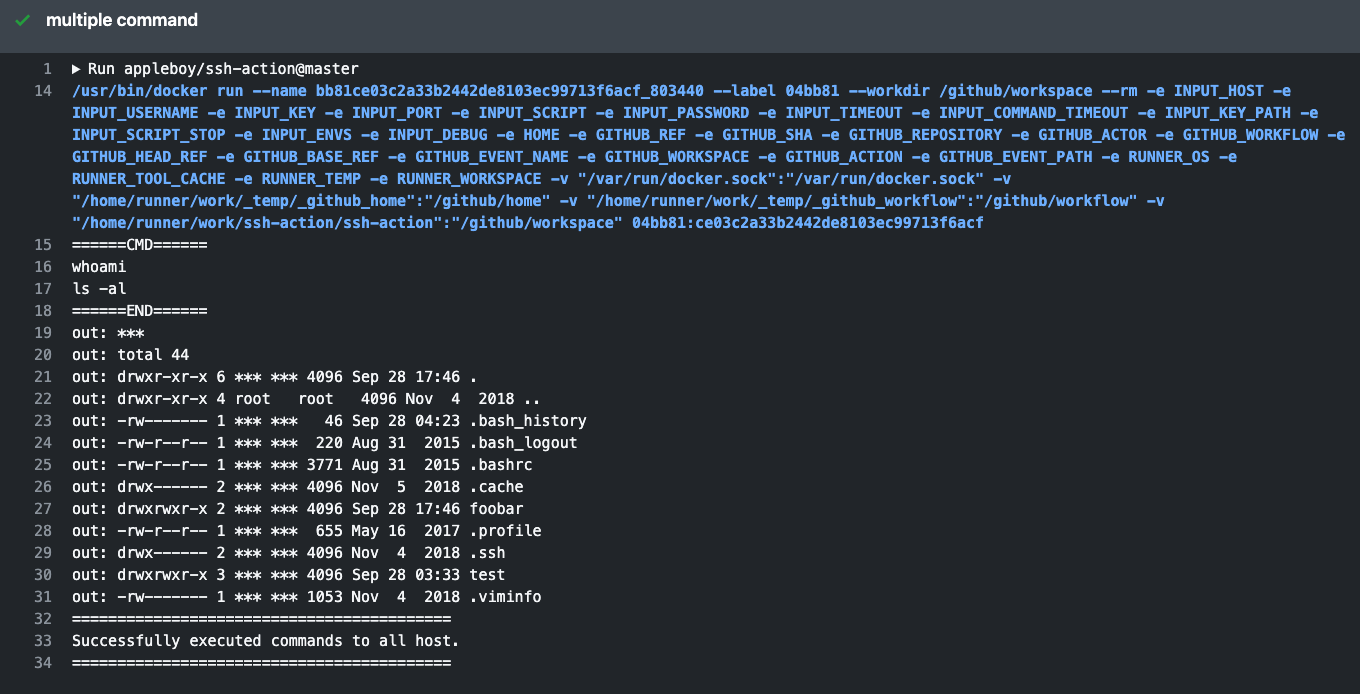
多个命令
- name: multiple command
  uses: appleboy/ssh-action@v1.2.0
  with:
    host: ${{ secrets.HOST }}
    username: ${{ secrets.USERNAME }}
    key: ${{ secrets.KEY }}
    port: ${{ secrets.PORT }}
    script: |
      whoami
      ls -al
多台主机
  - name: multiple host
    uses: appleboy/ssh-action@v1.2.0
    with:
-     host: ”foo.com“
+     host: ”foo.com,bar.com“
      username: ${{ secrets.USERNAME }}
      key: ${{ secrets.KEY }}
      port: ${{ secrets.PORT }}
      script: |
        whoami
        ls -al
Commands from a file
- name: file commands
  uses: appleboy/ssh-action@v1.2.0
  with:
    host: ${{ secrets.HOST }}
    username: ${{ secrets.USERNAME }}
    key: ${{ secrets.KEY }}
    port: ${{ secrets.PORT }}
    script_path: scripts/script.sh
多个不同端口的主机
  - name: multiple host
    uses: appleboy/ssh-action@v1.2.0
    with:
-     host: ”foo.com“
+     host: ”foo.com:1234,bar.com:5678“
      username: ${{ secrets.USERNAME }}
      key: ${{ secrets.KEY }}
      script: |
        whoami
        ls -al
在多台主机上同步执行
  - name: multiple host
    uses: appleboy/ssh-action@v1.2.0
    with:
      host: ”foo.com,bar.com“
+     sync: true
      username: ${{ secrets.USERNAME }}
      key: ${{ secrets.KEY }}
      port: ${{ secrets.PORT }}
      script: |
        whoami
        ls -al
将环境变量传递到 Shell 脚本
  - name: pass environment
    uses: appleboy/ssh-action@v1.2.0
+   env:
+     FOO: ”BAR“
+     BAR: ”FOO“
+     SHA: ${{ github.sha }}
    with:
      host: ${{ secrets.HOST }}
      username: ${{ secrets.USERNAME }}
      key: ${{ secrets.KEY }}
      port: ${{ secrets.PORT }}
+     envs: FOO,BAR,SHA
      script: |
        echo ”I am $FOO“
        echo ”I am $BAR“
        echo ”sha: $SHA“
在 env 对象中,您需要将每个环境变量作为字符串传递,传递 Integer 数据类型或任何其他类型可能会产生意外结果。
如何使用 ProxyCommand 连接远程服务器?
+———+       +-———+      +————+
| Laptop | <—>  | Jumphost | <—> | FooServer |
+———+       +-———+      +————+
在您的 ~/.ssh/config 文件中,您会看到以下内容。
Host Jumphost
  HostName Jumphost
  User ubuntu
  Port 22
  IdentityFile ~/.ssh/keys/jump_host.pem

Host FooServer
  HostName FooServer
  User ubuntu
  Port 22
  ProxyCommand ssh -q -W %h:%p Jumphost
如何将其转换为 GitHubActions 的 YAML 格式?
  - name: ssh proxy command
    uses: appleboy/ssh-action@v1.2.0
    with:
      host: ${{ secrets.HOST }}
      username: ${{ secrets.USERNAME }}
      key: ${{ secrets.KEY }}
      port: ${{ secrets.PORT }}
+     proxy_host: ${{ secrets.PROXY_HOST }}
+     proxy_username: ${{ secrets.PROXY_USERNAME }}
+     proxy_key: ${{ secrets.PROXY_KEY }}
+     proxy_port: ${{ secrets.PROXY_PORT }}
      script: |
        mkdir abc/def
        ls -al
如何保护私钥?
密码短语通常用于加密私钥。这使得攻击者无法单独使用密钥文件。文件泄露可能来自备份或停用的硬件,黑客通常可以从受攻击系统中泄露文件。因此,保护私钥非常重要。
  - name: ssh key passphrase
    uses: appleboy/ssh-action@v1.2.0
    with:
      host: ${{ secrets.HOST }}
      username: ${{ secrets.USERNAME }}
      key: ${{ secrets.KEY }}
      port: ${{ secrets.PORT }}
+     passphrase: ${{ secrets.PASSPHRASE }}
      script: |
        whoami
        ls -al
使用主机指纹验证
设置 SSH 主机指纹验证可以帮助防止中间人攻击。在设置之前,运行以下命令以获取 SSH 主机指纹。请记得将 ed25519 替换为您适当的密钥类型(rsa、 dsa等),而 example.com 则替换为您的主机。
现代 OpenSSH 版本中,需要提取的默认密钥类型是 rsa(从版本 5.1 开始)、ecdsa(从版本 6.0 开始)和 ed25519(从版本 6.7 开始)。
ssh example.com ssh-keygen -l -f /etc/ssh/ssh_host_ed25519_key.pub | cut -d ’ ‘ -f2
现在您可以调整您的配置:
  - name: ssh key passphrase
    uses: appleboy/ssh-action@v1.2.0
    with:
      host: ${{ secrets.HOST }}
      username: ${{ secrets.USERNAME }}
      key: ${{ secrets.KEY }}
      port: ${{ secrets.PORT }}
+     fingerprint: ${{ secrets.FINGERPRINT }}
      script: |
        whoami
        ls -al
贡献
我们非常希望您为 appleboy/ssh-action 做出贡献,欢迎提交请求!
授权方式
本项目中的脚本和文档采用 MIT 许可证 发布。

